Roof Sealant: A Solution to Preventing Leaks
When it comes to maintaining a sturdy and reliable roof, ensuring it is leak-free is of utmost importance. Without adequate protection, even the smallest leaks can lead to costly damages and extensive repairs. This is where roof sealants step in as a viable solution. By forming a protective layer over your roof, these sealants act as a safeguard against potential leaks. But how effective are they in reality? In this article, we will explore the effectiveness of roof sealants in preventing leaks, delving into their various types, application methods, and long-term benefits. By the end, you will have a comprehensive understanding of why roof sealants are a crucial component in maintaining the integrity of your roof.

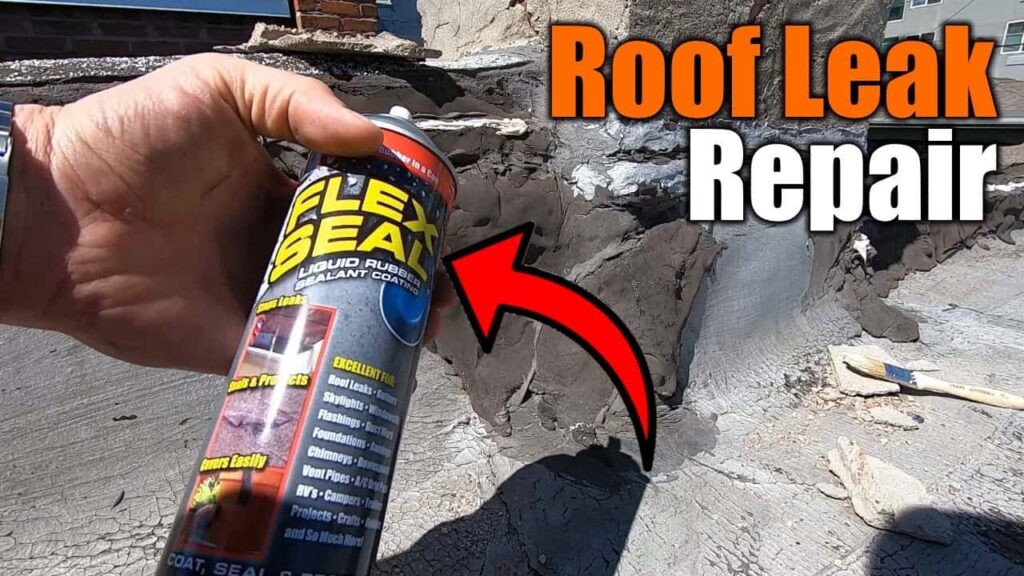
This image is property of mobileimages.lowes.com.
1. Understanding Roof Sealant
1.1 How does roof sealant work?
Roof sealant is a protective coating designed to prevent water from penetrating the roof and causing leaks. It forms a waterproof barrier on the surface of the roof, sealing any cracks or gaps that may be present. Roof sealant is typically made of a flexible material that can expand and contract with the changing temperatures, ensuring long-lasting protection.
1.2 Types of roof sealant
There are several different types of roof sealant available on the market, each with its own unique characteristics and applications. The most common types include silicone, acrylic, asphalt, and polyurethane sealants. Silicone sealants are known for their excellent durability and weather resistance, while acrylic sealants are more affordable and easy to apply. Asphalt sealants are commonly used on flat roofs, and polyurethane sealants offer superior adhesion and flexibility.
1.3 Benefits of using roof sealant
Using roof sealant can provide numerous benefits for both residential and commercial properties. Firstly, it helps prevent leaks by creating a watertight barrier on the roof surface, protecting the underlying structure from water damage. Secondly, roof sealant can improve energy efficiency by sealing air leaks and reducing heat transfer. This can result in lower energy bills and a more comfortable indoor environment. Additionally, roof sealant can enhance the appearance of the roof, increasing the property’s curb appeal and potentially its value.
2. Signs of Roof Leaks
2.1 Water stains on ceilings
One of the most obvious signs of a roof leak is the presence of water stains on the ceilings or walls inside your home. These stains may appear as discolored patches or streaks, indicating that water is seeping through the roof and causing damage to the interior of the building. It is important to address these stains promptly to prevent further water damage and potential mold growth.
2.2 Damp or musty smell
If you notice a damp or musty smell in your home, it may be a sign of a roof leak. When water enters your home through a leaky roof, it can create a moist environment that promotes the growth of mold and mildew. These fungi can produce a distinct odor, which can be a clear indication that there is a leak in your roof that needs to be addressed.
2.3 Peeling paint or wallpaper
Another sign of a roof leak is peeling or bubbling paint and wallpaper on your walls or ceilings. When water infiltrates through the roof, it can cause the paint or wallpaper to lose adhesion and start to separate from the surface. If you notice any areas where the paint or wallpaper is peeling or bubbled, it is important to investigate further for potential roof leaks.
2.4 Mold or mildew growth
The presence of mold or mildew in your home can be a telltale sign of a roof leak. When water enters your home through a leaky roof, it can create a damp environment that provides the perfect conditions for mold and mildew growth. If you notice any black or green spots on the walls, ceilings, or other surfaces, it is important to address the issue promptly to prevent further damage and potential health hazards.
2.5 Dripping water or visible leaks
In some cases, you may actually see water dripping from the ceiling or notice visible leaks during rainy weather. This is a clear indication that there is a roof leak that needs to be addressed immediately. Ignoring visible leaks can lead to significant water damage and structural issues, so it is important to take action as soon as you notice any signs of a leak.
3. Importance of Preventing Roof Leaks
3.1 Damage to the structure
Preventing roof leaks is crucial to maintaining the structural integrity of a building. When water penetrates through the roof, it can damage the underlying materials, such as wood or insulation. Over time, this can weaken the structure and compromise its stability. By using roof sealant to prevent leaks, you can protect the structural components of your roof and extend its lifespan.
3.2 Health hazards
Roof leaks can create a breeding ground for mold and mildew, which can pose serious health risks to occupants. Exposure to mold spores can trigger allergic reactions, respiratory issues, and even infections in individuals with weakened immune systems. By preventing roof leaks, you can minimize the risk of mold growth and create a healthier indoor environment.
3.3 Higher energy bills
Leaky roofs can result in increased energy bills, as they allow warm air to escape during the winter and cool air to escape during the summer. This leads to higher heating and cooling costs as your HVAC system works harder to maintain a comfortable temperature. By sealing your roof with a high-quality sealant, you can enhance the energy efficiency of your home or building and reduce your monthly utility expenses.
3.4 Aesthetics and property value
A leaky roof can significantly detract from the appearance of a property. Water stains on ceilings and walls, peeling paint or wallpaper, and visible leaks can make a space look neglected and poorly maintained. Additionally, a roof in poor condition can lower the overall value of a property. By preventing roof leaks and maintaining the condition of your roof, you can preserve the aesthetics of your property and potentially increase its resale value.
4. Choosing the Right Roof Sealant
4.1 Compatibility with roof materials
When choosing a roof sealant, it is important to select one that is compatible with the materials of your roof. Different sealants adhere better to specific surfaces, so it is essential to check the manufacturer’s recommendations and choose a sealant that is suitable for your roof type. This will ensure optimal adhesion and performance.
4.2 Durability and longevity
The durability and longevity of a roof sealant are important factors to consider. Look for a sealant that is specifically formulated for long-lasting protection against the elements. It should be able to withstand UV exposure, temperature changes, and other environmental factors without deteriorating or losing its effectiveness.
4.3 UV resistance
UV resistance is particularly important for roof sealants, as they are constantly exposed to sunlight. Over time, UV rays can cause the sealant to degrade and become less effective. Look for a sealant that is specifically designed to resist UV damage, as this will ensure that it maintains its protective properties and extends the lifespan of your roof.
4.4 Waterproofing properties
A primary function of roof sealant is to provide a waterproof barrier. Therefore, it is essential to choose a sealant that has excellent waterproofing properties. Look for a sealant that forms a tight seal on the roof surface, preventing water from penetrating and causing leaks. Additionally, consider a sealant that can withstand heavy rainfall and extreme weather conditions.
4.5 Ease of application
Consider the ease of application when choosing a roof sealant, especially if you plan to apply it yourself. Some sealants are designed for professional use and may require specialized equipment or training. Look for a sealant that is easy to apply, whether it comes in a spray, brush-on, or roll-on form. This will ensure a smooth and efficient application process.

This image is property of spraypaintsart.com.
5. Steps to Apply Roof Sealant
5.1 Roof surface preparation
Before applying roof sealant, it is important to properly prepare the surface. This involves cleaning the roof and removing any debris or loose materials. Use a broom or pressure washer to remove dirt, leaves, and other debris. Additionally, inspect the roof for any cracks, gaps, or damage that may need to be repaired prior to application.
5.2 Cleaning and removing debris
Thoroughly clean the roof surface to ensure proper adhesion of the sealant. Use a mild detergent and water solution to remove any dirt, grease, or stains. Scrub the surface with a scrub brush or broom to loosen stubborn debris. Rinse the roof with clean water and allow it to dry completely before applying the sealant.
5.3 Patching leaks and cracks
If you identify any leaks or cracks during the surface preparation process, it is important to repair them before applying the sealant. Use a roof patching compound or caulk to fill any gaps or holes in the roof. Allow the patches to dry completely before proceeding with the sealant application.
5.4 Applying primer if needed
In some cases, applying a primer may be necessary to ensure optimal adhesion of the sealant. Check the manufacturer’s instructions to determine if a primer is recommended for your specific sealant. If so, apply the primer according to the instructions and allow it to dry fully before proceeding to the next step.
5.5 Applying the roof sealant
Once the roof surface is properly prepared, it is time to apply the roof sealant. Follow the instructions provided by the manufacturer for the best application method. This may involve using a brush, roller, or spray applicator. Apply the sealant evenly, making sure to cover all areas prone to leaks, such as seams, flashing, and vents. Work in small sections to ensure thorough coverage and a consistent finish. Allow the sealant to dry completely before exposing it to rain or other weather elements.
6. Regular Roof Maintenance
6.1 Inspecting the roof for damage
Regular roof maintenance is crucial for preventing leaks and prolonging the lifespan of your roof. Schedule routine inspections to check for any signs of damage, such as missing or damaged shingles, cracks, or loose flashing. By identifying and repairing issues early on, you can prevent them from escalating into major problems that require costly repairs.
6.2 Clearing debris and vegetation
Regularly clearing debris and vegetation from your roof is an important maintenance task. Leaves, branches, and other debris can accumulate on the roof surface and in gutters, leading to clogs and water pooling. Trim overhanging branches and remove any debris to ensure proper drainage and prevent water from collecting on the roof.
6.3 Repairing small leaks promptly
Small leaks can quickly escalate into major problems if left unattended. As part of your regular roof maintenance routine, promptly repair any small leaks that you discover. Use a roof patching compound or caulk to seal the leaks, and monitor the area to ensure that the repair holds and no further leaks occur.
6.4 Regularly cleaning and maintaining gutters
Proper gutter maintenance is essential for preventing roof leaks. Clean your gutters regularly to remove leaves, debris, and other obstructions that can prevent water from flowing freely. Ensure that the gutters are securely attached to the roof and that downspouts are pointed away from the foundation of the building. Regular gutter maintenance will help prevent water from overflowing and seeping into the roof.

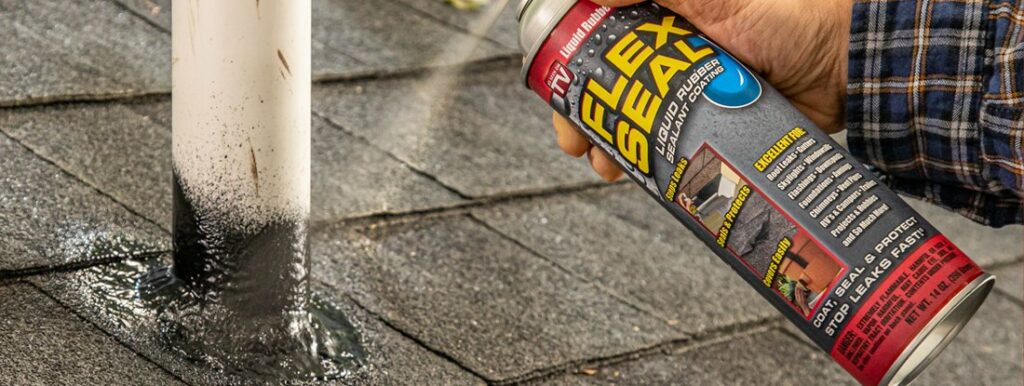
This image is property of flexsealproducts.com.
7. Professional Roof Sealant Application
7.1 Choosing a professional roofing contractor
If you prefer to have a professional handle the roof sealant application, it is crucial to choose a reputable roofing contractor. Look for contractors who have experience in roof sealant application and a track record of delivering quality work. Research customer reviews, ask for referrals, and compare quotes from multiple contractors before making a decision.
7.2 Assessing the extent of damage
A professional roofing contractor will begin the process by assessing the extent of any existing roof damage. This may involve a thorough inspection of the roof and identifying areas that require repair or additional attention. By properly assessing the damage, the contractor can determine the best course of action and recommend the appropriate sealant for your specific needs.
7.3 Preparing the roof surface
Before applying the roof sealant, the contractor will prepare the roof surface to ensure optimal adhesion and performance. This may involve cleaning the surface, removing debris, and patching any existing leaks or cracks. The contractor will use professional-grade equipment and techniques to ensure a thorough and effective surface preparation process.
7.4 Applying multiple layers of sealant
To ensure maximum protection against leaks, a professional contractor may apply multiple layers of sealant. Each layer will be applied evenly and allowed to dry before the next layer is added. This layering technique increases the thickness and durability of the sealant, providing enhanced protection against the elements.
7.5 Quality inspection and warranty
Once the roof sealant application is complete, a reputable roofing contractor will conduct a quality inspection to ensure that the job has been done correctly. They will check for any missed spots, inconsistencies, or potential areas of concern. Additionally, a professional contractor will provide a warranty or guarantee on the sealant application, giving you peace of mind and protection against any future issues.
8. Additional Measures for Leak Prevention
8.1 Installing proper insulation
Proper insulation plays a crucial role in preventing roof leaks. Insulation helps regulate the temperature and moisture levels in your attic, preventing heat and condensation from causing damage to the roof’s structure. Effective insulation can also reduce energy loss and improve energy efficiency.
8.2 Ventilation and attic air circulation
Proper attic ventilation is essential for preventing roof leaks. It helps expel excess heat and moisture, reducing the risk of condensation and moisture damage. Ensure that your attic is properly ventilated with vents or fans to promote air circulation and maintain a healthy environment for your roof.
8.3 Installing gutter guards
Gutter guards are an effective measure to prevent clogged gutters and water overflow. These guards are installed over your gutters to keep debris, leaves, and other materials from entering and clogging the system. By preventing clogs, gutter guards help maintain proper water flow and prevent water from seeping into your roof.
8.4 Regular roof inspections and repairs
Regular roof inspections and repairs are essential for leak prevention. Schedule annual or biannual inspections to identify and address any potential issues before they lead to leaks. Promptly repair any damage or worn-out areas on your roof to prevent further deterioration and potential leaks.

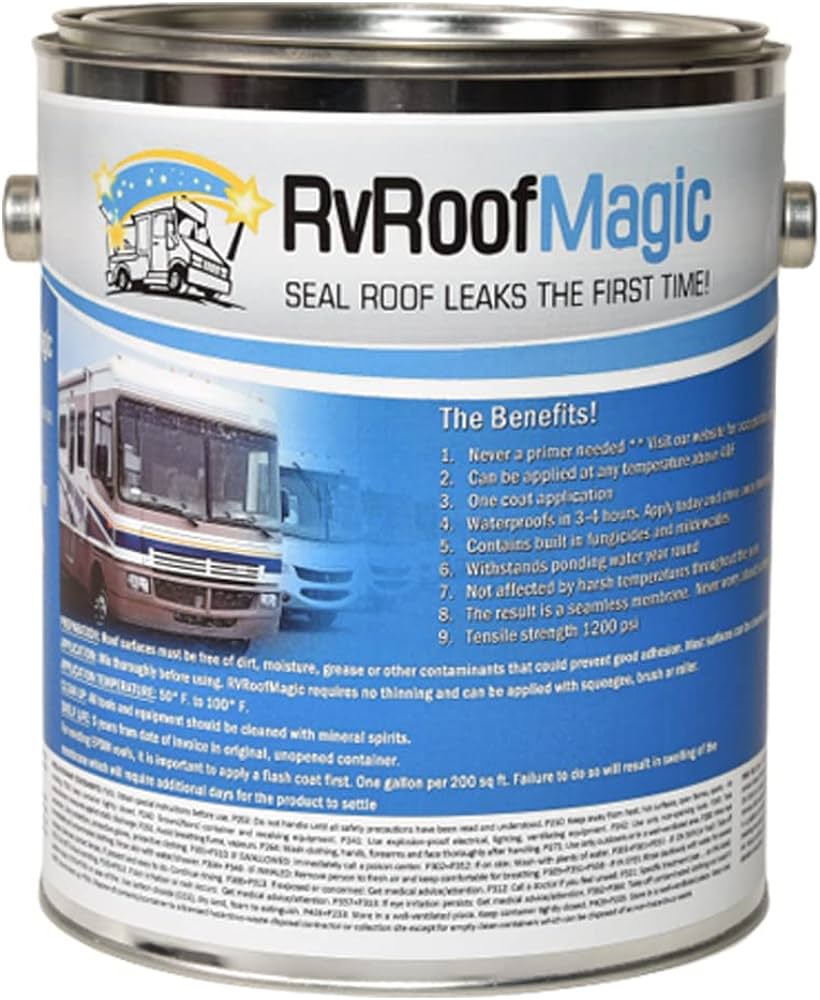
This image is property of Amazon.com.
9. DIY Roof Sealant Application
9.1 Safety precautions and equipment
When applying roof sealant yourself, it is important to take necessary safety precautions. Wear appropriate protective gear, such as gloves and goggles, to protect yourself from chemicals and potential injuries. Use a sturdy ladder and practice safe ladder usage. Additionally, ensure that you have all the necessary equipment and tools, such as a brush, roller, or spray applicator, as well as the sealant itself.
9.2 Choosing the right time and weather conditions
Choose a day with clear weather and moderate temperatures for your DIY roof sealant application. Avoid extremely hot or cold days, as extreme temperatures can affect the performance of the sealant. Additionally, avoid rainy or windy days, as these conditions can make the application process more difficult and affect the drying time of the sealant.
9.3 Properly cleaning and preparing the roof
Follow the same steps for roof surface preparation described in section 5 of this article. Thoroughly clean the roof and remove any debris or loose materials. Inspect the roof for any cracks or leaks that need to be repaired prior to applying the sealant. Ensure that the roof surface is dry before proceeding with the application.
9.4 Applying the sealant with precision
Carefully follow the manufacturer’s instructions for applying the sealant. Whether you are using a brush, roller, or spray applicator, apply the sealant evenly over the roof surface, paying close attention to areas prone to leaks. Work in small sections to ensure thorough coverage and a consistent finish. Take your time and apply the sealant with precision to achieve the best results.
9.5 Post-application inspections and touch-ups
After applying the roof sealant, conduct a thorough inspection to ensure that all areas have been properly coated. Look for any missed spots, inconsistencies, or potential areas of concern. If necessary, apply additional sealant to ensure complete coverage. Monitor the roof for any signs of leaks or damage, and perform regular inspections and touch-ups as needed to maintain the effectiveness of the sealant.
10. Top Roof Sealant Brands
10.1 Brand A: Features and benefits
Brand A offers a wide range of roof sealants that provide excellent durability, adhesion, and waterproofing properties. Their sealants are compatible with various roof materials and can withstand harsh weather conditions. Brand A sealants have high UV resistance, ensuring long-lasting protection against the sun’s rays. They are also easy to apply and offer a range of application methods, including spray, brush-on, and roll-on.
10.2 Brand B: Features and benefits
Brand B specializes in roof sealants that are known for their exceptional durability and longevity. Their sealants have been formulated to withstand extreme temperatures and resist cracking, peeling, and shrinkage over time. Brand B sealants also offer excellent waterproofing properties, preventing leaks and water damage. They are compatible with various roof materials and are easy to apply, making them a popular choice among homeowners and professionals alike.
10.3 Brand C: Features and benefits
Brand C is recognized for its high-quality roof sealants that provide superior adhesion and flexibility. Their sealants are designed to bond tightly to different roof surfaces, ensuring a long-lasting and watertight seal. Brand C sealants offer excellent UV resistance and can withstand the harshest weather conditions without deteriorating. They are easy to apply and provide a smooth finish, enhancing the aesthetics of the roof. Many users have praised Brand C sealants for their reliability and effectiveness in preventing leaks.
In conclusion, roof sealant is an essential tool for preventing leaks and protecting the structure, aesthetics, and value of your property. By understanding how roof sealant works, recognizing the signs of roof leaks, and taking preventive measures, you can effectively maintain and prolong the lifespan of your roof. Choosing the right roof sealant, whether through professional application or a DIY approach, is crucial for achieving optimal results. Regular roof maintenance and inspections, along with additional measures such as proper insulation and gutter maintenance, are also key in preventing leaks and ensuring the long-term performance of your roof. With the wide variety of top-quality roof sealant brands available, you can confidently select the one that best fits your specific needs and enjoy a leak-free and well-protected roof.

This image is property of images.thdstatic.com.


